Grade Roster
Important notes
- Faculty who are listed as the “primary instructor” in the Schedule of Classes may Enter and Approve grades. For team taught classes, both instructors (primary and secondary) have the ability to Enter and Approve grades, and will need to coordinate the entry and approval of grades for the roster.
- Grades are visible to students in their self-service Student Center after instructors enter/approve them in the Grade Roster and the grades are posted by the Office of the Registrar.
- If a grade roster does not appear for a class, or you receive an error message when changing a grade online, please contact Records@csumb.edu.
You must first log in to OASIS from your CSUMB Dashboard
From Self Service select Faculty Center and then My Schedule

Click on the Grade Roster icon next to the desired course.
For help navigating to the Faculty Center, visit the Faculty Center help page.
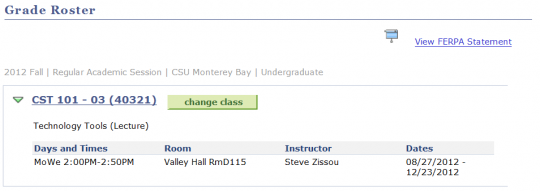

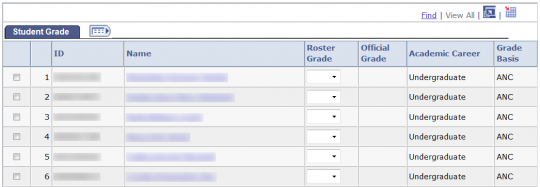

1) Make sure the Grade Roster Type is set to Final Grade

2) Enter Grades next to each student using the drop down box under Roster Grade

3) Click Save periodically as you enter grades. Be sure to click Save when have finished entering all grades.

4) When you have finished entering all grades change the Grade Roster Action status to Approved and click Save.

The request grade change link is only available after the grade rosters are posted.
1) Navigate to the grade roster and click the “Request Grade Change” link.
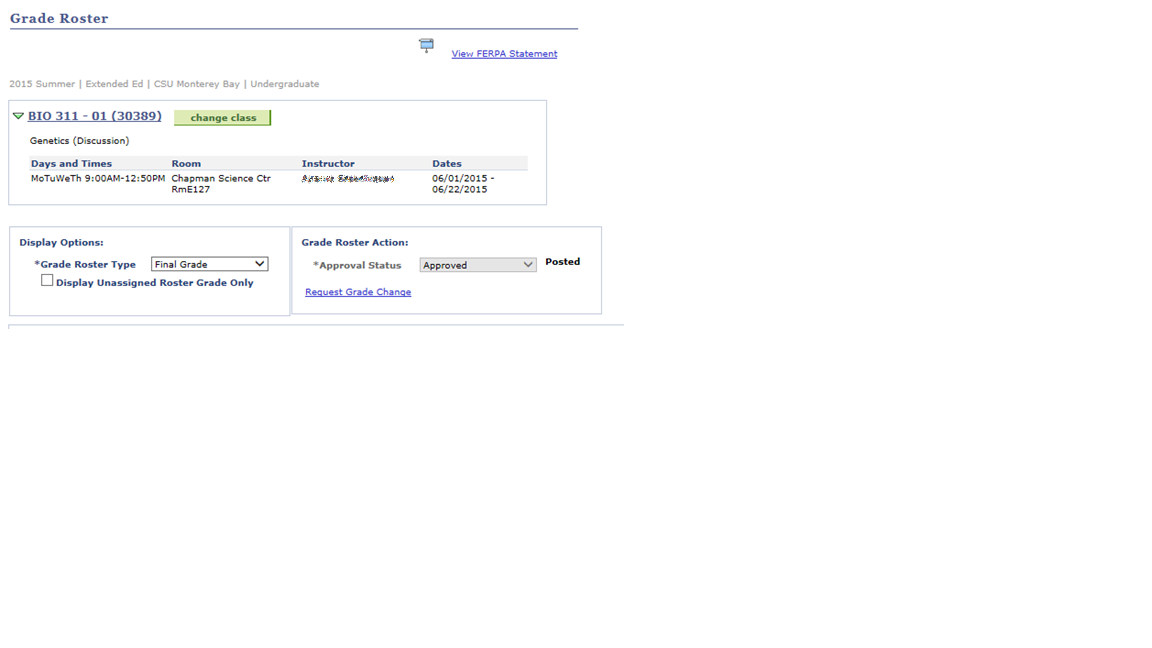
The Request Grade Change link shows only on rosters that have been posted.2) Locate grade to be changed and click the “Submit Request” button.
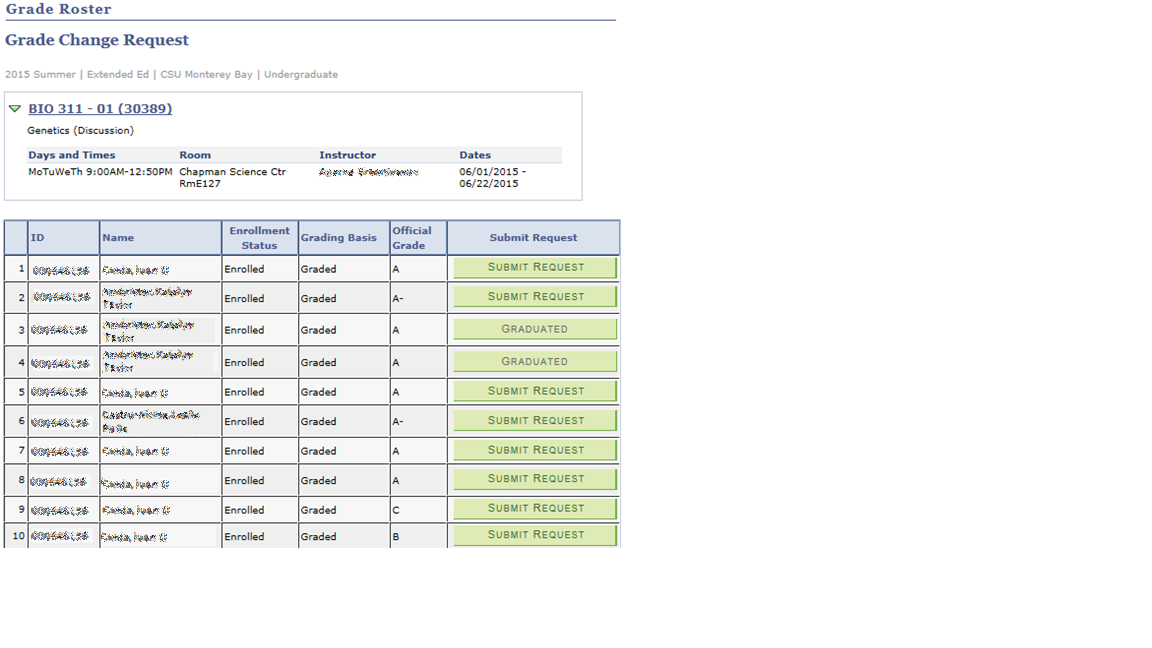
To the right of the official grade will be a column with information about each student. If the student has graduated, it will be indicated and the grade change cannot be requested. If the student received a W, it will indicate administrative grade, which cannot be changed. If the grade change has already been requested, the status will indicate In Review. Click Submit request to request a grade change.3) Complete the grade change request page and click the “Submit” button.
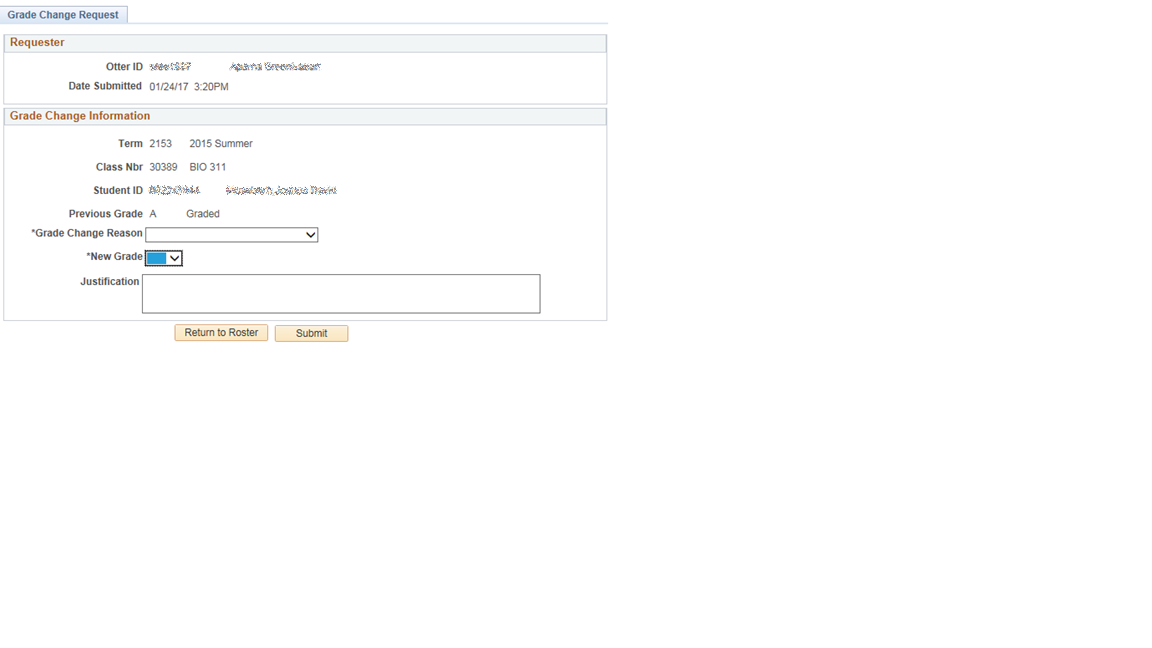
Select grade change reason: Grade change reason is limited by previous grade. For example, the students previous is A, so the only grade change reason available is correction of grade.
Select new grade: Grade options are limited to those that are allowed for the students grading mode. For example, if the student received a letter grade, their grade can only be changed to a letter grade.
Enter justification: This is not a required field. Please remember that this becomes part of the student record upon entry, and only enter information that is required to submit the grade change.
Click Submit: You will receive a message that the request has been submitted successfully.
Depending on the timeframe of the grade change, it will be sent directly to the Registrar’s office for processing, or to the College Dean and possibly the Provost for additional review. Once approved by the persons required, it will route to the Registrar for processing.
4) View the status of a submitted request or cancel a request
Upon final approval or deny, you will receive an email that the grade change has been processed. You can also log in anytime to check the status of the grade change request.
Navigate to the grade roster and select the Request Grade Change link.
Click Review Status for the student who has a grade change pending
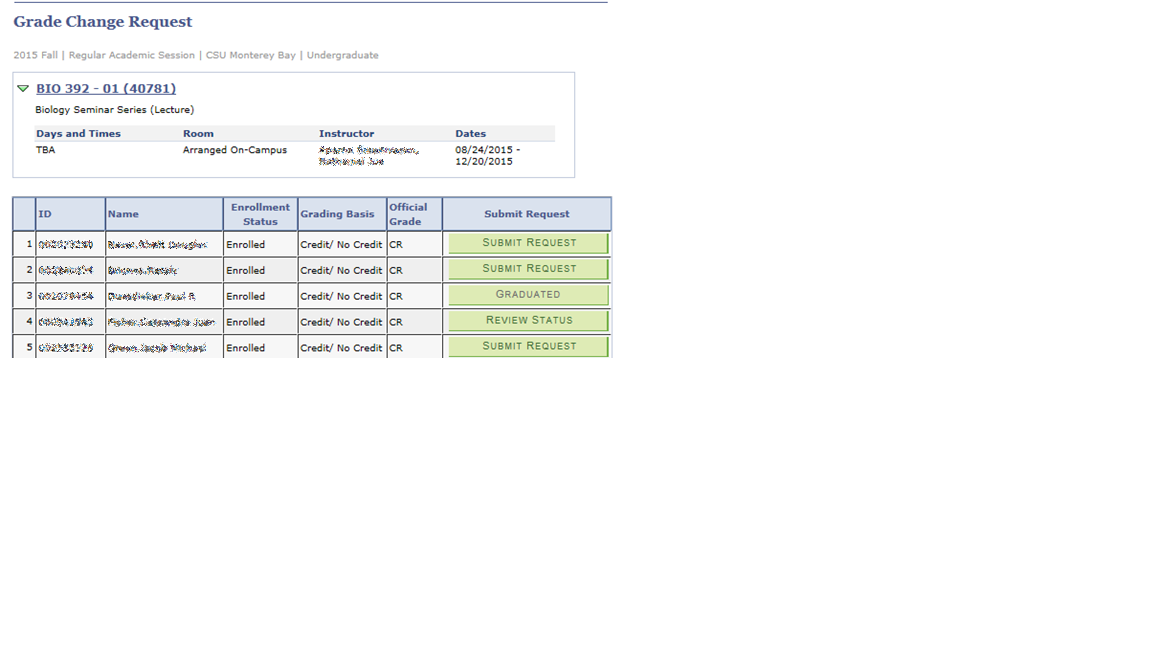
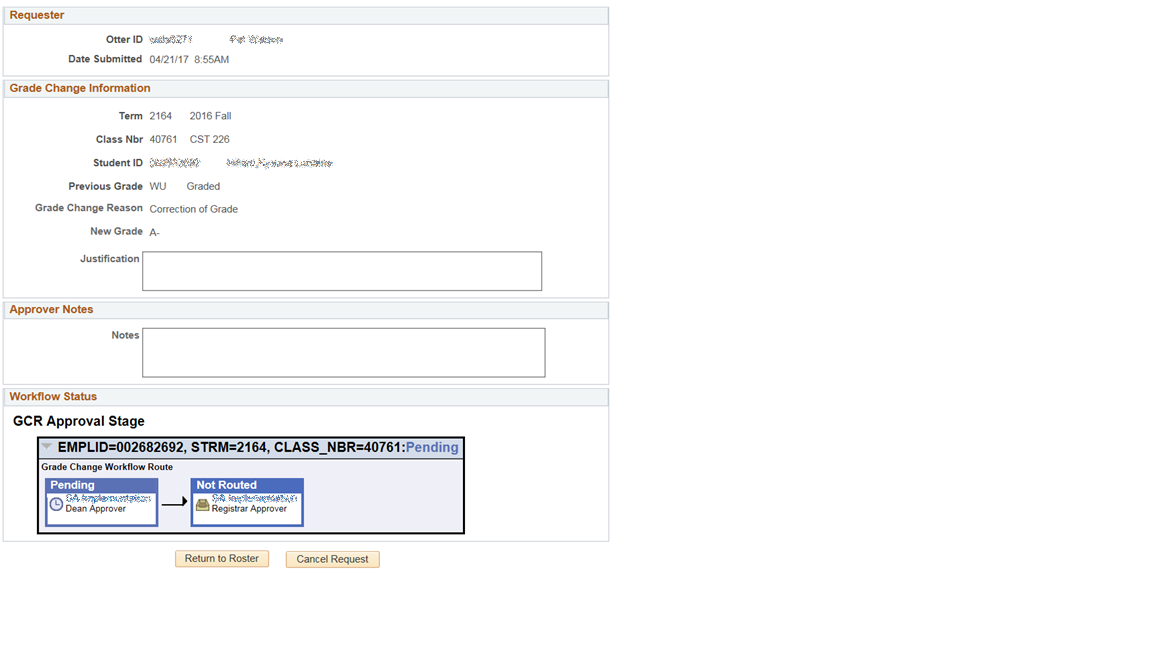
You will see the information that was submitted, along with a visual of the workflow status.
Cancel Request: Cancelling a request terminates processing and enables you to re-enter grade change information, in case of administrative error. As long as the request is ‘pending’ and has not been processed by the Registrar’s office, you may cancel the request.
Paper Grade Change Forms still required when
· An electronic request has already been processed for a particular student & class number
· A student was not on the grade roster at the time that grades were posted for the class (i.e. late add)
· A students’ final grade roster status is not equal to posted, even if they are listed on the grade roster
· The Instructor of record does not have access to OASIS or no longer teaches at the university
· The Dept Chair/Dean is submitting a grade change request on behalf of the instructor
Bulk grade assignment
You can assign multiple students the same grade at the same time. This feature is here to help making grading large classes faster,
1) Check the box in front of the students ID number.

2) Once you have checked the students you wish to assign the same grade select the grade in the box to the left of "Add this grade to selected Students".

3) Once the grade has been selected click on the "Add this grade to selected students" button.

4) Click Save periodically as you enter grades. Be sure to click Save when have finished entering all grades.
5) When you have finished entering all grades change the Grade Roster Action status to Approved and click Save.

Note: Before moving onto the next group of students click the "Clear All" link
Download to Excel
1) On the Grade Roster page Click the Download to Excel button to export the grade roster into a file that can be read by spreadsheet applications like Excel.
2) A File Download dialog box will appear. This box will vary depending on which web browser you are using. Select Save and select a location to save the file.
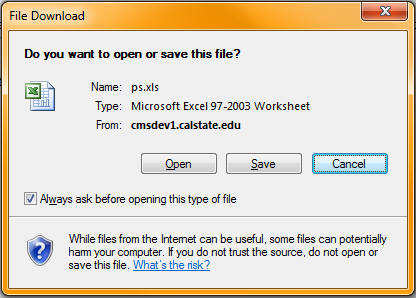
Note: If you do not get the File Download dialog box you will need to setup your browser to allow for pop-ups from OASIS. If you haven't yet setup your browser to allow pop-ups please visit the Faculty Browser setup help page.
Printer friendly version
1) To print a copy of the roster, click the Printer Friendly Version link at the bottom of the Class Roster page.

2) Select the File > Print option from the browser menu.
Change class

To change classes click on the Change Class button. You will be taken back to your My Schedule page.
Notify students
1) Place a check next to individual students you wish to email

2) Click the Notify Selected Students Button

3) Type your message into the Message Text box.
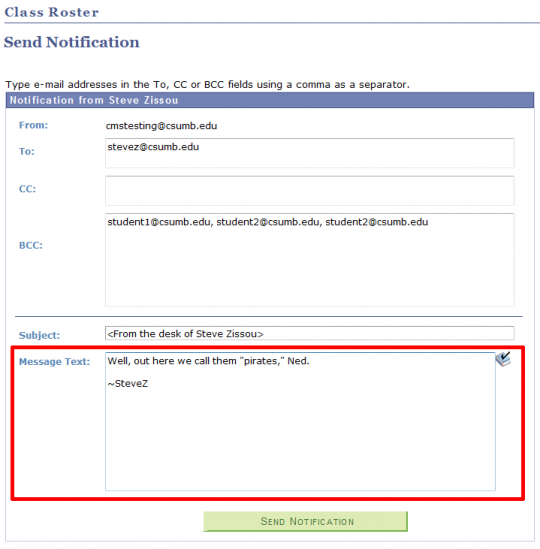
4) When ready click the Send Notification button.

Notify all students
1) Click the Notify All Students Button

2) Type your message into the Message Text box.
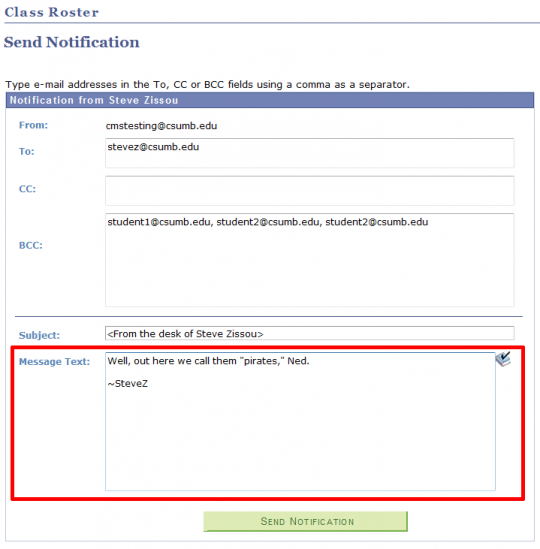
3) When ready to send click the Send Notification button.

