Using the schedule planner
Schedule Planner will give you every possible schedule based on your selections. It can even factor in your work or practice hours. The best part? You can load your schedule straight into your enrollment shopping cart! Watch the tutorial video or follow the step by step instructions below.
Step 1
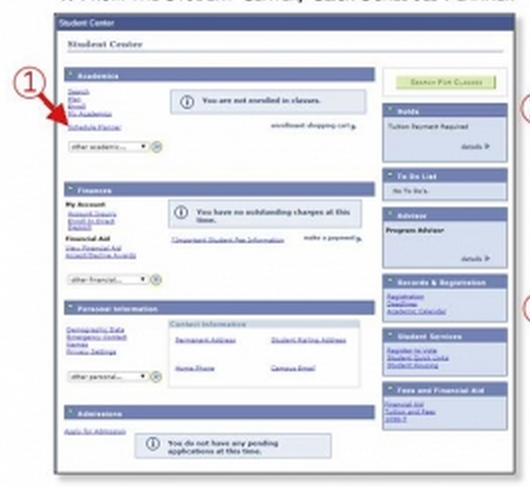
From your dashboard, click the OASIS link. This will take you to your OASIS Student Center. From here, click Schedule Planner.

Step 2
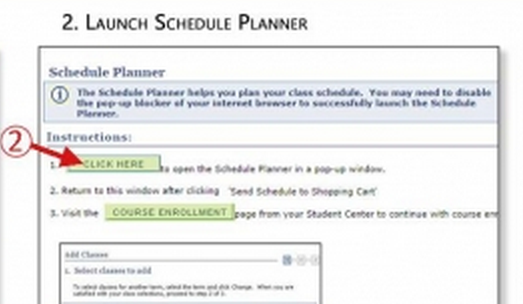
Launch the schedule planner.

Step 3
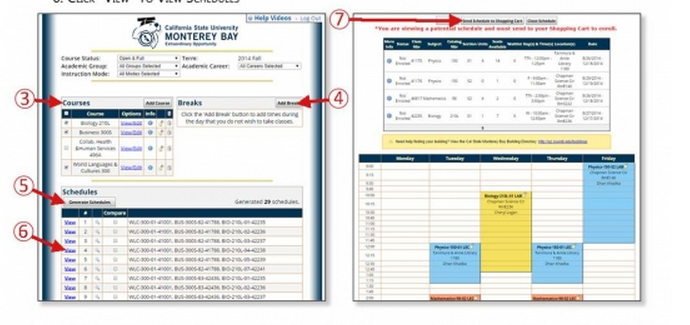
Add courses to take next term.

Step 4
Add breaks to block off times you can't attend classes.
Step 5
Click "Generate schedules."
Step 6
Click to view schedules.
Step 7
When you've found a schedule you like, click "Send to Shopping cart."
Step 8
Click "Import Cart" to begin registration.